Tag Archives: key

Day 9: Let the Beauty You Love, Be What You Do

Let the Beauty You Love

Day 9: Let the beauty you love, be what you do.

My desk had become crazy messy with all the crafting I’m doing. My work space was shrinking as more supplies made their way to the desktop and the layers of paper, pens, glue sticks, scissors, brushes, embellishments, rubber stamps crept into the little empty place in the center.  Before I started crafting today, I spent 30 minutes putting away tools and supplies I wasn’t using and organizing (re-stacking) stuff I planned to use today.

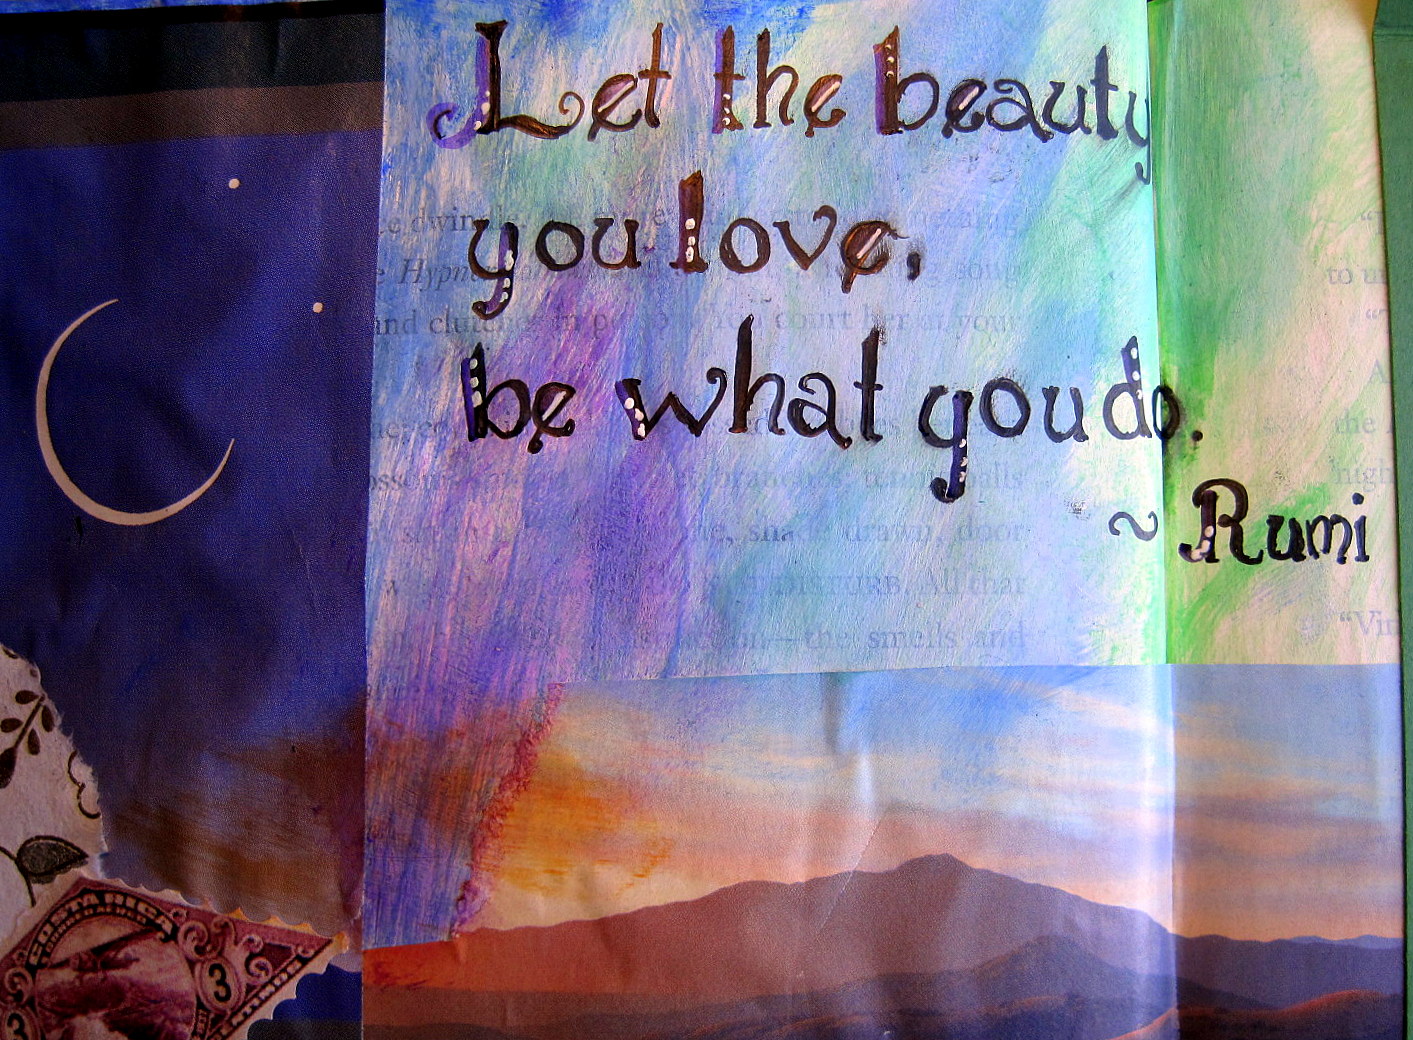
As I sorted through the flotsam and jetsam, collecting little scraps and interesting bits, I saw that I was halfway to getting a spread assembled. I had a quote from Rumi scribbled on an envelope, a glittery bit of trim cut off an old calendar page but saved for it’s sparkling possibilities, a heart-shaped stencil with interesting paint smears and a pretty crescent moon that my sister let me snag from her collection of images.

I decided to use these in a page and knew I’d be using the beautiful image of a purple bottle I’ve been wanting to include.  It is too tall for my book,  but I love how it looks, so just made a little fold-out flap to include it.

Flap with Key

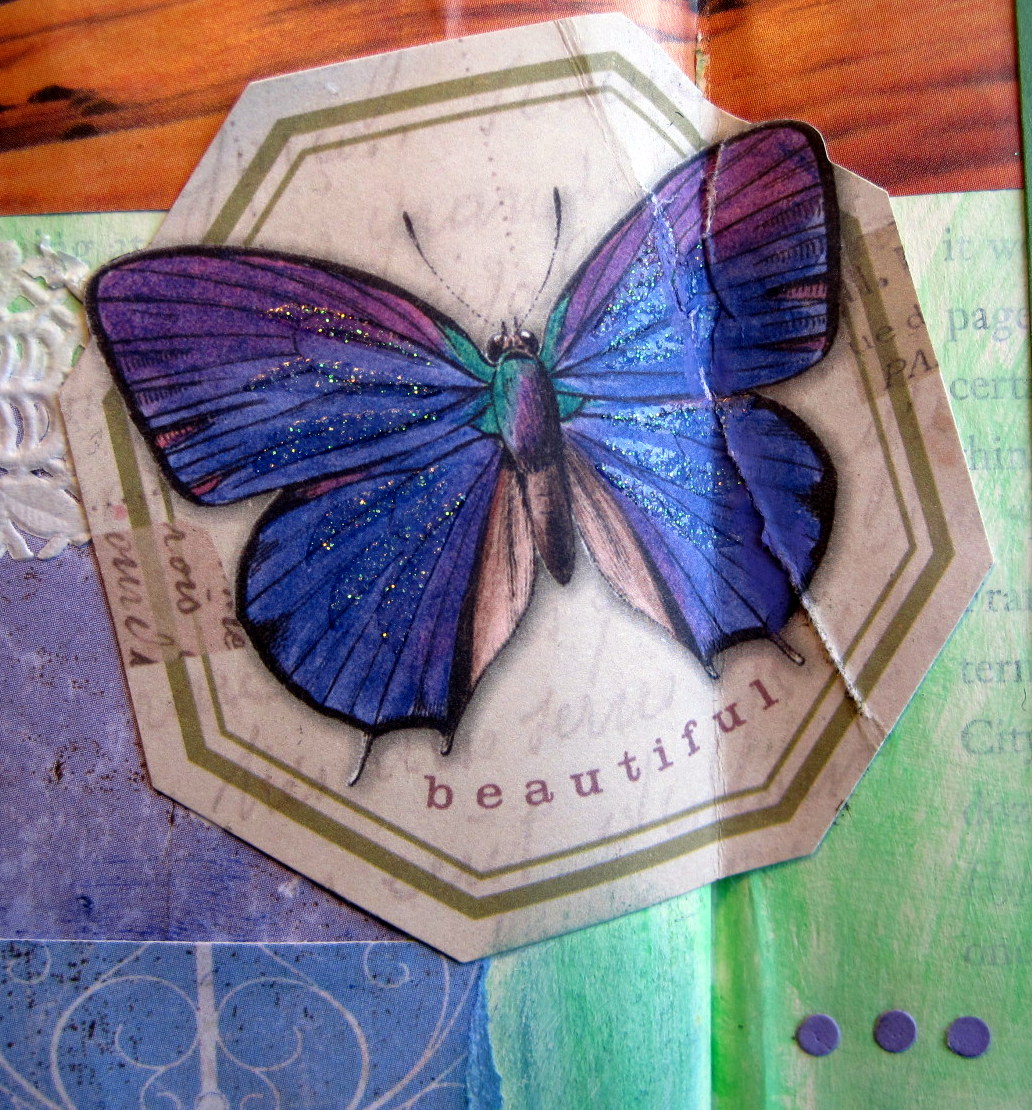
The butterfly and heart scraps were leftovers from previous projects and with a few more scraps from the pile, a great photo from a magazine of a painting of Mt. Tam, some paint and a few more embellishments, my spread for Day 9 was just about done.

I got everything glued in place and carefully wrote out the quote from Rumi.

Rumi quote

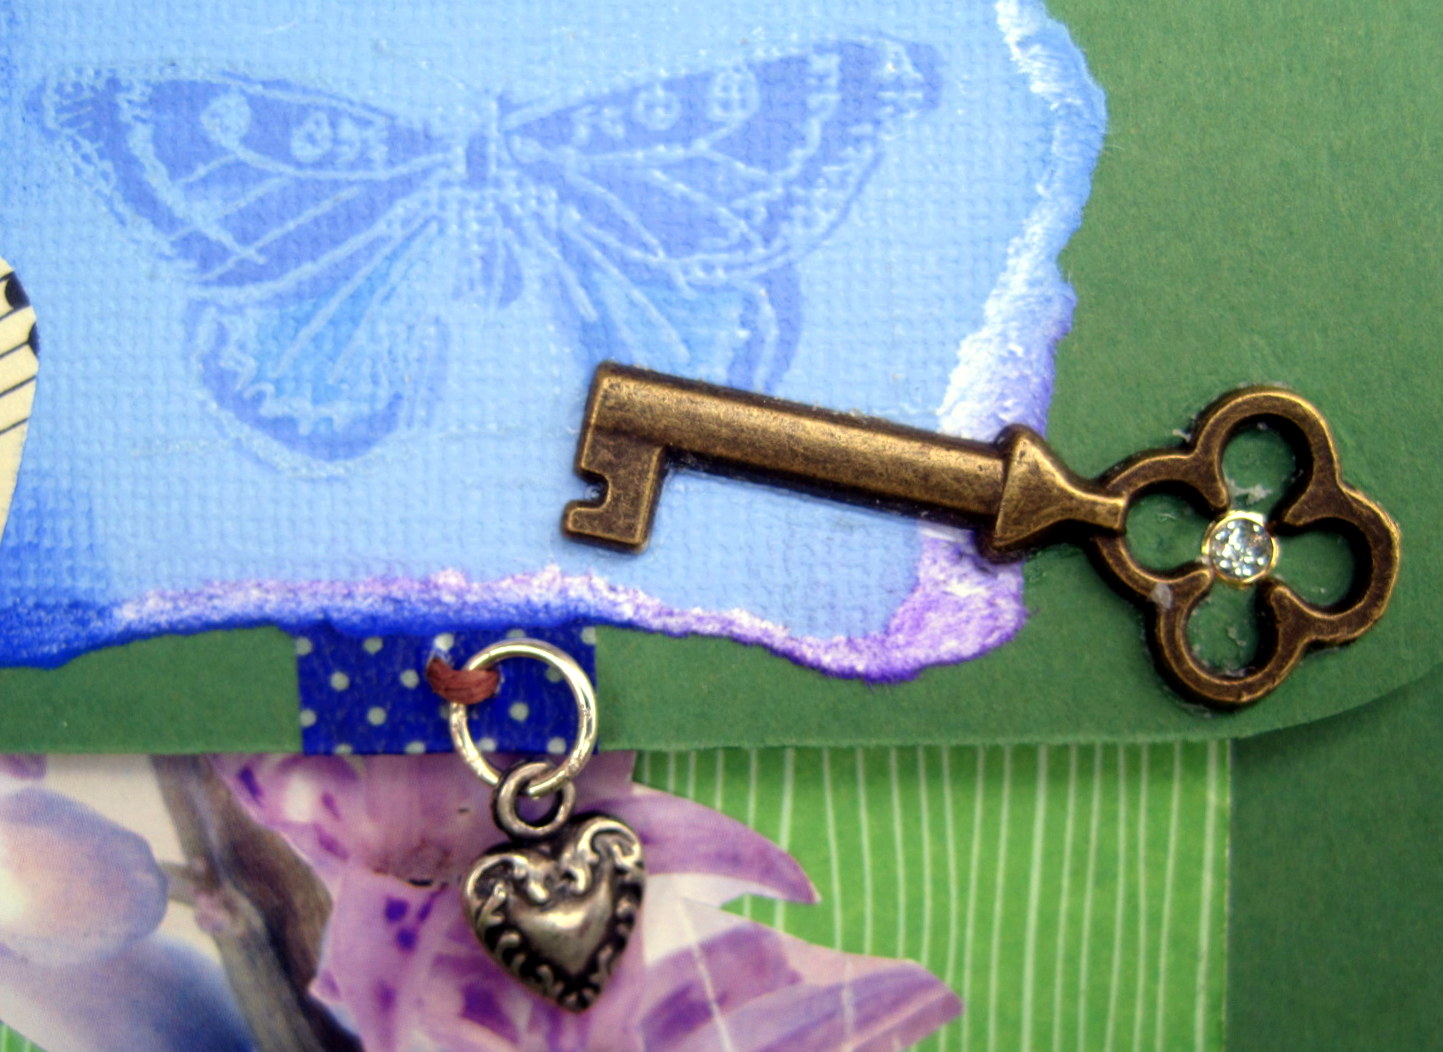
I had started with a small, paper key but liked this metal one better so I switched it out and added a little sparkly dot.  A heart charm dangles down from the flap.

Key

Dianne Dots were the finishing touch.

Dianne Dots

I also made two more birthday cards to get my mom stocked up.

Birthday Bird & Collage

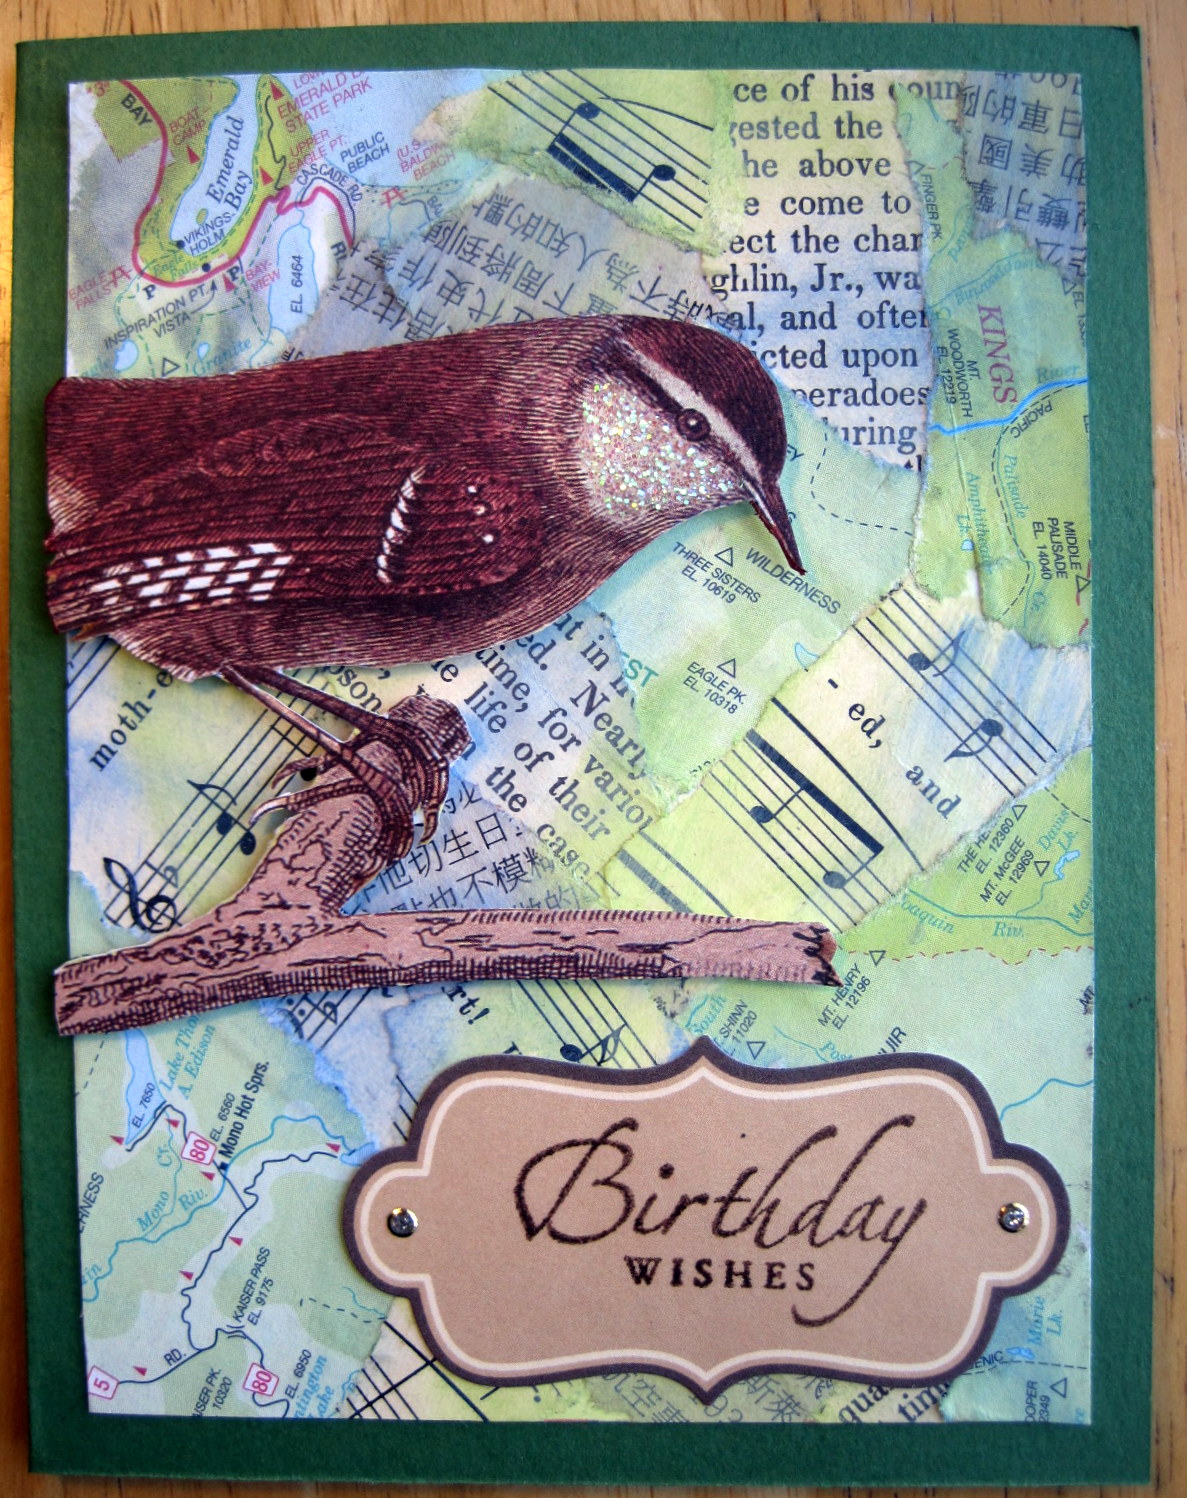
The bird came from the same old calendar as the little glittery border I used in my Art Journal.  Thanks, Shook!

Cigar Label Birthday Card

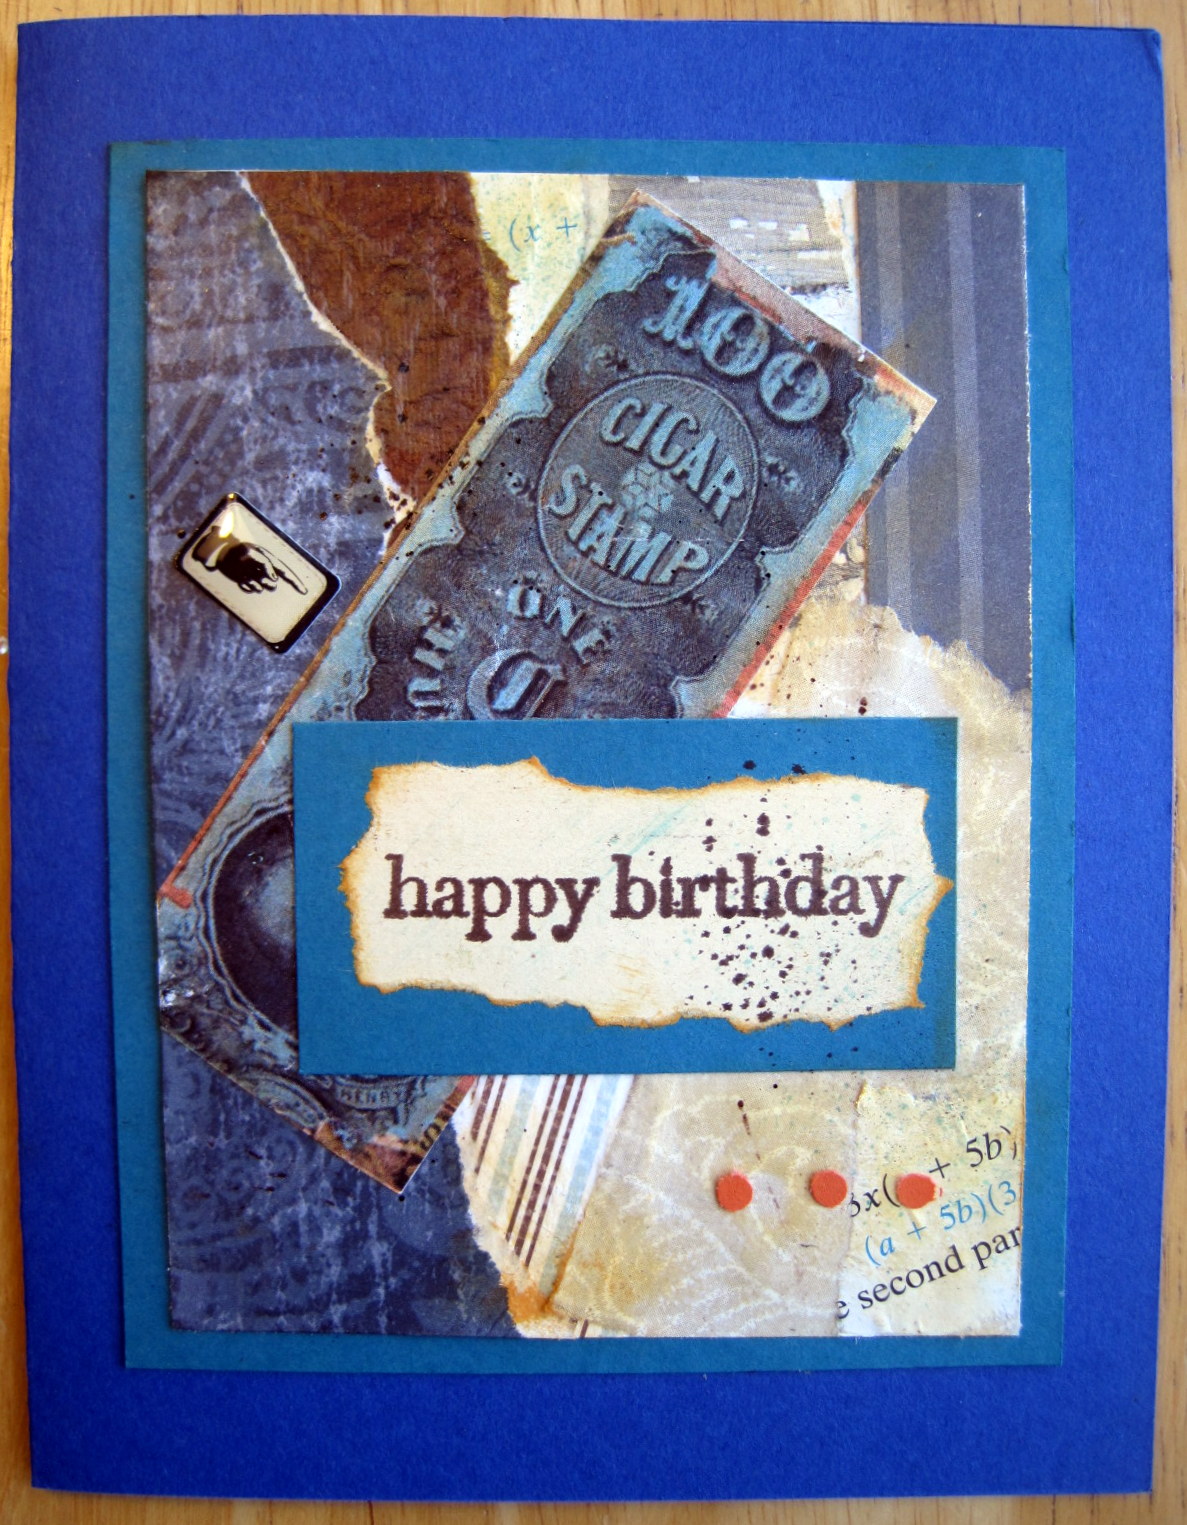
Both of these cards used paper and embellishments that were already out on my desk.

If I took a picture of it now you probably wouldn’t believe that I’d cleaned it up, but I know that it is much better than it was.

Last year for Day 9 of 30 Days of Creativity I made these pretty Glass Tile Pendants.

The year before that I made a pair of Pink Glass Earrings.

Thanks for coming on by.

4 Comments

Filed under 30DOC, Crafts

Patchwork Quilt Card

Phil and Tedra were having a country wedding at her grandparents farm in Oregon. I didn’t make it to the wedding but I wanted to send a special card.  I’ve know Phil since he was a wee lad and can hardly believe he was getting married, but it was true.

My current favorite card size is 5.5 inches square.  I make an envelope that is 5.75 inches square with a template from Paper Source.

For this card I didn’t know much about the ceremony but the invitation included a sketch of the wedding location that reminded of the charming map sketch of the “Hundred Acre Wood” by E.H. Shepard in Winnie-the-Pooh. I decided a country patchwork quilt was what I wanted to create.

I sorted through my printed papers and picked out pieces that fit my theme.  I picked some because the pattern looked vintage or country (red gingham, sunflower seed packet, cowboy boots) or they just seemed right for a patchwork quilt. I spent a lot of time on this part of the process.  As I often do when crafting a card for a loved one, I thought of Phil.  I haven’t really been in his life much since he was a kid but it was It was fun going through my paper and looking for designs I thought might work.

A piece of old map was in one corner, nearly hidden by my embellishment.  I made a little tag with “love” stamped on it, a small patchwork heart and added a key charm and tied them all together with a piece of natural hemp twine.  An old shirt button accented another square.

I had an old topographical map that I used to make the envelope. A bit of collage on the front included a scrap of sheet music over-stamped with the definition of love. I added a piece of washi tape and an old postage stamp.

I included a large, beautiful image of a Great White Heron from a greeting card of a painting by Tim Brody.

Another bird in the lower right corner added to the envelope decoration – this one carrying a heart and my love.

A quilt, a key, maps, music, the definition of love.  Yes, I think I got everything into it that I wanted.

Congratulations to Phil and Tedra.

8 Comments

Filed under Crafts, Life

Bracelet Keyring

I have just two keys that I carry at work.  I keep them separate from other keys because I don’t want to carry around the car fob (aka the “beeper” or “clicker”) all day at the office.  For years I have had these keys on a stretchy plastic cord like an old style phone cord.

Mine looked a lot like this one but it broke so I don’t have a picture of it.   I could slip the cord on my wrist when I was out of my office and if I did set them down, the bright red helped me notice them on a desk our counter top and remember to pick them up.  Most of the time.

Over the years, the plastic got kind of grimy and I often thought I should clean it but I never got around to it. Then it broke and I decided make a replacement instead of buying another plastic one.

Although I’ve been very focused on beads and bracelets lately, for this super simple project I used big, chunky beads.  I had an old beaded watch band I’d made years ago with beads that I loved.  I never repaired it because I don’t wear a watch but I saved the beads and now I had a use for some of them.

Lots of places sell beads, not just bead stores.  Michaels, Joann, and even Walmart. If you don’t live near a store with beads, there are a bazillion stores online selling beads.  Like this one.  Or this one.

I think this is best for a ring with only a few keys.  I like to slip it over my wrist when I am walking around the campus.  Lots of keys would have made it too heavy for that.

I used a fairly thick, stretchy bead cord – 1 mm Stretch Magic.

Cut a piece of cord about 10 or 12 inches long so you have plenty of length for knotting.  String the beads – if you want you can tie a loose knot with the first bead to keep the others from slipping right off the other end.  I like how it looks with small beads as spacers in between the big ones.

When you think you have enough,  hold the cord ends tight with one hand and see if you can fit your hand through the bracelet.  You don’t want it so big it will fall off or so small it strangles your wrist.  Add or remove beads as needed to get the right size.  Slide your key ring on.

Tie a knot in the cord.  Now take one end of the cord and thread it back through a few beads in one direction and thread  the other end back the other way through a few beads.  Tie each end once around the cord in the bracelet and, if you can, push the end back through to the original knot.  I didn’t originally glue the knots but I did after using it for a few weeks after reading on  a bead site that they recommend that.  I used E6000 but there are probably better bead adhesives.  After the glue dries, trim the ends.  That’s it!

I love quick and easy projects and this is something I use every day at work. I made one for my mom after she admired mine.  I bet there are plenty of you reading this who’ve got the beads at home.  Go ahead, dress up your keys.  This is so much cuter than the old one and it makes me happy.

It also makes me happy that you stopped by for a visit.  Thanks!

1 Comment

Filed under Crafts

Day 16: Shrinky Dink Key Ring

Oh, what a face!  Day 16 and another idea for a Father’s Day craft.  Of course you can make a key ring for yourself or a friend too.

This is a great way to use a cute photo (or fun vintage one).  You need to get Shrinky Dinks shrinkable plastic for Ink-jet printers which I purchased at Michaels.  There are very specific directions in the package such as lighten the photo before printing so it isn’t too dark once it shrinks and make photo large enough to shrink down – it will be 1/3 the original size and 9 times thicker when you’re finished.  Be sure to punch a standard size hole prior to shrinking.  I rounded the corners too.

Then fire up the toaster oven and watch the magic!  It curls and writhes and yes, it shrinks.  It eventually flattens out  (most of the time, anyway) or you can help it along with a wood spoon or chopstick.  Let it cool and add some rings which I found at my local hardware store.   A layer of protective coating is advised in the Shrinky Dink directions.  But I didn’t do that.

Wouldn’t this be more fun for Dad than a tie?

Happy Father’s Day to my Dad, David.  I’m in the green dress on the key ring above along with my siblings.

Note: If you don’t have an ink-jet printer, their website FAQ’s says you can use the standard “Frosted Rough and Ready” Shrinky Dinks and run them through a copier.  Hello, Kinko’s!

7 Comments

Filed under 30DOC, Crafts