Tag Archives: DIY

Tea Bag Tag Blessings

20151213_201932

Here is a sweet gift idea that I got from a colleague. Her daughters looked up DIY Christmas gifts online and found these: replace the tags on tea bags with your own sweet messages. Then they were so excited with how the project turned out, they insisted she open the gift early!

In my case, instead of replacing existing tag,  I added tags, as the box I used didn’t have any. I cut small tags, wrote little messages on them, punched a hole in each tag, looped baker’s twine through the hole and knotted it, and stapled the knot in the twine to the edge of the bag.

20151213_202632

To keep the tea fresh, I put them in small cello bags and wrote the type of tea on some pretty labels from my craft stash. A flowery mug from a discount store finished the gift.

Now, every time my friend enjoys a cup of tea, there is a little message to lift her spirits and brighten her day.

20151213_202023-001

Keep calm and drink tea.

Thanks for the visit.

1 Comment

Filed under Crafts

Jamberry Nail Wraps

IMG_0528

Have you seen Jamberry Nail Wraps? I’m not sure where I first saw them, but it was probably on Facebook. They are thin plastic stickers that are applied to your nail after briefly heating (either with a hair dryer or small heater that Jamberry sells) and then pressing on the nail and trimming and/or filing off the edges of the wraps.

I love how a manicure looks but since it is usually smeared or chipped before I get home (and even worse if I try and do it myself) and ruined within a day, I rarely bother with one.  As a crafter, my fingers usually have ink or paint on them.  I wore acrylic nails for about a year, usually opting for a “natural French” polish (off white tips with pale pink), but the time and money spent on upkeep was a drag, not to mention how terrible it was if I caught a nail on something. Growing out my nails after that was tedious.

IMG_0132

I saw a photo caption that mentioned Jamberry’s and it mentioned how the wraps covered split nails and allowed them to grow them out a bit. Since both my thumbnails split, this caught my attention and I decided to give them a look.

IMG_0034

I went to their website and watched the How to Apply video and looked at all the different colors and designs and decided to jump in and order some.  I bought an application kit that includes alcohol wipes, nail scissors, nail clippers, orange sticks, nail file, cuticle pusher and buffer block.  I could have managed with what I had at home and bought some nail scissors but I just got the set.

The wraps come on a clear plastic sheet ($15 per sheet, and I’ve gotten three manicures from one sheet with some trimming), and are different sizes so you can hold the sheet over each nail to decide which size to use. You bend the sheet and roll one wrap part way off using an orange stick and cut it in half, so each sticker will do two nails.  The first time I did it, I was trying to completely custom fit each nail but I’ve learned (and they suggest) it is easiest to go for a slightly smaller wrap rather than trim a wider one.

IMG_0516

I also bought their mini heater. They suggest a hair dryer will also work to heat the wraps but I thought that would be complicated; having to pick up the dryer, turn it on, heat the wrap, turn the dryer off,  put it down, apply the warm wrap to my finger.  I’m glad I got the heater because it is small, quiet and I can just leave it on the whole time I’m doing my mani.

IMG_0518

So, you figure out which wrap is the best fit, cut it in half, and warm the wrap for about 3 to 5 seconds.

IMG_0525

Put the wrap on your nail and press and rub it down, first with your opposite thumb, then with the rubber cuticle pusher to really get it firmly pressed around all the edges.

IMG_0526

Then warm the fingertip in front of the heater to complete the application. Finally, trim off the excess wrap.  The directions suggest using the nail scissors to trim and then file off any little bits, using the file perpendicular to your nail.  I’ve found I usually trim off the last bits with nail clippers, though I sometimes need the file to finish.

As you know, I do a lot of crafting.  I use my fingers to open, pry, press, spread, pick, and scrape any number of items and materials when I cook and craft. I’m kind of hard on my nails and the Jamberry Nail Wraps aren’t perfect.  I’ve found they will lift a bit, coming unstuck at the tips.

I looked around on YouTube and there are loads of videos with all different methods for applying, fixing and removing these wraps.  What works best for me is very, very carefully, using my flatiron on the tips. I turn it on, count to 10, turn it off and wait a few more seconds than being super careful press the warm iron only on the tips of my nails to really get a good seal. Let me emphasize again that I do this with great caution and care, heating the flatiron only briefly and turning it OFF before using it.

If this just sounds crazy and/or you don’t have a flatiron (I think a curling iron would also work), I’ve also used a metal implement (spoon cuticle pusher) that I heat in front of the heater and press on the tip of my nail, but the flatiron method works best for me.

The tips do get worn and of course my nails grow out.  This is almost two weeks of wear and growth on a manicure.

IMG_0105-001

Removing the wraps is pretty simple and again there are several options.  What you don’t want to do is just pull them off because the adhesive is strong and you can damage your nails. Lift the edge of the wrap with an orange stick then soak the nail in nail polish remover (I use the cap of the remover bottle) for 15 to 20 seconds and gently rub off with a cotton ball or pad.  Sometimes I have to soak again to get a stubborn wrap off or to remove adhesive residue. I tried a warm coconut oil method I saw on YouTube and though I love the scent, I didn’t find it as effective.

Another method involves heating the nail with a hair-dryer for 15 seconds and gently peeling off from side to side and yet another uses dental floss on a sword to slip under the wrap with some cuticle oil or warm coconut oil.  I haven’t tried these methods as I’m happy with the nail polish remover.

IMG_0036

IMG_0142

Wraps shown in this post: First photo: Grapefruit. Last photo: Rose Gold (I think it looks like a new copper penny, also comes in a sparkle version). Blue wrap: Seascape. Pink wrap: Haute Pink (tint – a somewhat more sheer wrap).

I bought all the wraps and supplies and I’m not selling Jamberry.  I like the product and wanted to share my experience with you. They offer a Buy 3 get 1 free special, so if you like them, you can stock up on wraps and save a little.  I found a consultant, Jess Chambers, after finding her Enjoying Jams blog.  If you know someone who sells Jamberry Nail Wraps, you might want to get some from her and check them out, but if you don’t, I’m sure Jess would be happy to help you out.

Thanks for stopping by.


3 Comments

Filed under Life

12 Ideas for Christmas

Clothespin Doll Elves

Here are links to 12 past posts I’ve written with some of my favorite (Christmas) things. No girls in white dresses with blue satin sashes, but recipes, gift ideas, ornaments, a card and wrapping paper you can make.

These Glass Tile Pendants use beautiful scraps of paper.  A link to an Etsy site has beautiful tiles, jewelry bails (the little loop), glaze and chains.

IMG_0236

Another necklace idea are these Hand Stamped Washer Pendants.  I gave them out last year and still love and wear the one I made for myself.

IMG_0084

Ornaments are some of my favorite gifts to make and these are some of my favorite ornaments.

Vellum Ornaments are like miniature works of stained glass made with vellum paper, stickers, colored markers and stick on jewels.

Since I said I was going to share 12 things, I’m not going to give you the link, but if you click on the link for the Vellum Ornaments, you can go to the next post and find Easy Paper Heart Ornaments for a simpler project.

IMG_0210

Last year I made a whole bunch of these Little Clothespin Doll Ornaments.  They are really fun to make and I really enjoyed the details that gave each little doll her character.

IMG_0089

If you like to make your wrapping extra special, here are two ideas.

First is Vegetable Printed Wrapping Paper.  It is really easy and looks great.

IMG_0160

This is a way of scrunching tissue paper while wrapping for a ruched effect.  Take a look at  Scrunched Tissue Paper Wrapping to see how to do it yourself and also how to make the tissue paper roses.

IMG_0166

I used to make and send LOADS of Christmas cards.  It started to feel like a chore that I no longer enjoyed.  After a few years of sending no cards, I make a handful and I’m happier.

This is the card I made two years ago.  The Half Circle Christmas Tree (or Angel) Card is made using two-sided paper and embellishments.  It’s a fairly easy technique and the results are really cute.  Do the same fold and make it into an angel.

IMG_0014

Always popular are food gifts.  I made this easy and delicious Infused Oil after receiving some as a gift myself and I decided to reuse the bottle.

IMG_0001

How about a gift of fudge or truffles?  This Chocolate Nutella Fudge & Truffles recipe makes creamy and delicious treats.

IMG_0040

Christmas Crunch is a sweet salty combination of cereal, M&M’s, pretzels, nuts and melted white and peanut butter morsels.  Make a batch for a party or potluck.

IMG_0027

These Cheese Wafers are a big hit.  My niece, Caitlin, often requests I bring them to our family Christmas Eve party.  They’re made just like drop cookies but are loaded with sharp cheddar cheese, butter, Rice Krispies and a little flour.

IMG_0047

My twelfth and final Christmas idea is the ever-popular and oh-so-delicious Cracker Toffee made with Saltines, butter, brown sugar, vanilla, chocolate chips and pecans or almonds.  I LOVE this stuff.

IMG_0323

I would be delighted to hear if you use any of these crafts or recipes this Christmas.

Thank you for your visit.


3 Comments

Filed under Cooking, Crafts

Chalkboard Mother’s Day Card

Chalkboard Card w/Envelope

Happy Mother’s Day!  I usually manage to post something about Mother’s Day before the actual day but not this time.

I had several ideas for a Mother’s Day card. I’m not going to mention the other ones because I may use one next year.

Hope Chest 6x6 Paper

I found this pretty “Hope Chest” 6×6 paper pack by Josephine Kimberling and decided to go with the idea of a Chalkboard card and use this paper.  I really like the colors and designs.

Handwritten sentiments on chalkboard backgrounds have been a popular trend for a while.  I thought the black and white would balance the sweetness of the pretty paper collection.

All the White Pens

To start, I dug out various white pens, pencils, crayons and even water color and made a sample of each on black card stock.  My greeting would be the “chalkboard” part of the card.

Samples from White Pens

Then I looked through my rubber stamps and found a cute oval frame.  I stamped it on black paper using VersaMark ink followed by white embossing powder.  The rest is hand lettered.

I embellished the greeting with some flowers and flourishes and some ruled lines.  Most of the white is done with the uni-ball Signo pen and the DecoColor pen but I also used the white Prismacolor pencil.  Some details were filled in with colored Prismacolor pencils as well.

Card Elements

I glued the black card stock with the greeting onto a piece of printed turquoise paper and used wavy scissors to cut around the the edge.  Coral-rose card stock is the base card and I picked out some washi tape and a pink doily. I cut out flowers from the Hope Chest paper and was ready to assemble the card.

Washi tape

The inspiration for the card layout was right on the back cover of the 6×6 paper pack.  I didn’t have all the same elements, but a very similar finished product.  I started with strips of washi tape.

IMG_0042-001

More washi for a border.  I know must of this was eventually covered up, but some of it still shows.

Then I started layering on the doily and the flowers.  The last ones were adhered with foam dots for some depth.  A stick-on pearl was the final embellishment.

Finished Card + Envelope

I’d cut out more flowers than would fit on the card, so used one on the envelope.

The inside of the card has less detail, but follows the same pattern with a chalkboard greeting, some washi tape and some flowers.

Happy Mother's Day card inside

As usual, I finished it off with my little combined “df” on the back and, in this case, a white embossed flower.

handcrafted

I think it is important to sign your creations.

Closer Card

I’m pleased with this Chalkboard Mother’s Day Card and I think you’ll see more chalkboard designs in the future.

I’m also really happy that at the age of 54, my mom still puts my artwork up on her fridge!

Fridge Art

Thanks, Mom! I love you.

Thanks you for stopping by.

1 Comment

Filed under Crafts

Little Clothespin Doll Ornaments

Two Elves

Belated Christmas greetings to one and all!  I’ve been a busy elf, crafting these cute little clothespin doll ornaments and I didn’t want to share them before the holiday because they were all gifts.

To be honest, I’ve also been using up all my discretionary time on Christmas projects: these ornaments, a bit of cooking, a little shopping, another craft project (washer necklaces – I’ll show you those another day soon) and wrapping, mailing, and tagging of gifts.  I’m sorry that I really haven’t had time to catch up with you here.

Santa Lucia (dark hair)

The awesome  Once Around, a craft shop in Mill Valley, offers free, weekly, drop-in workshops.  Earlier in December, I had a delightful Tuesday evening at “Craft Gym” making Santa Lucia clothespin dolls.  I went online before the class and found lots of cute pictures on Pinterest, like this one and this one.

A wonderful bonus to the craft gathering was seeing a friend from grade school, Victoria Murphy, née Thomas, and her sister, Phoenicia.  So not only did I get a free class, some craft-shopping time and a fun evening, but I had a nice visit with old friends.

Mrs. Claus

The store is a well-stocked with beautiful arts and craft supplies, and it is always a pleasure to visit and browse.  Here are some pictures are from a previous visit.  As you can imagine, I’m like the proverbial kid in a candy store!

Ribbon PunchesRubber StampsOil Pastels

Yarn Card Stock & Envelopes

Once Around has a “Do-Dads” section with jars of little goodies like tiny shells, miniature candy canes, sequins, itty-bitty baskets,  little jingle-bells, buttons and bows which were perfect for this project.

Do-dads

Little Doodads

The clothespin dolls (also called peg dolls or clothespeg dolls) are fun to make.  I like how small they are and how each little detail can really add character and personality to the finished dolls.

Striped Socks

Striped socks and buckled Mary-Jane shoes and a little basket for Little Red Riding Hood.

Red Riding Hood

Music for the caroler

Tiny sheet music made from washi tape for the caroler.

Caroler

Candle Wreath

Toothpick candles and embroidery floss braids for Santa Lucia.

Santa Lucia

Another aspect that amps up the adorable factor of these dolls is their big heads.  I’ve made clothespin ornaments before and found the small head of the clothespin to be a little unsatisfactory.  When I saw dolls with the wooden bead added for the head, I knew that was the way I wanted to do it.

Clothespin Doll Supplies

The dolls are pretty simply: old-fashioned wooden clothespins (I prefer the one that is flat at the end, but the pointed-end ones also work and look great for some of the designs), wooden head bead, pipe cleaners for the arms and paint for the facial features and hair.  I first grabbed some paint at the dollar store because I was short on both time and brains. Don’t waste your time on dollar store paint.  It looked almost the same as these paints, similar containers and all, but the paint was thick and gloppy and had very little pigment.  It was very frustrating and wasted my time and money (yes, only a dollar, but still).

By the way, I couldn’t find the heads in local shops and ordered them from Clickety Clack Collectibles on Etsy.  These are the dimensions: 1-1/4 inches in diameter with a 19/32 inch hole x 5/8 inch deep.  There are little wooden stands that I’m going to buy too but for these I used a small screw eye screwed into the top of the head so I could attach an ornament hook.

I work on the dolls in stages – use some folded tape on a clothespin to attach a head so you can paint the face and hair.

Tape on clothespin head

Head attached with tape for painting

A round toothpick dipped into paint is a perfect tool for dotting on the eyes.

Round toothpick into the paint

Dot on the paint for eyes

After painting the mouth and cheeks with a very small brush, I set the peg to dry on the edge of a glass.

Drying on the edge of a glass

Most of the time I painted the hair on.  I started with a darker color and then added detail with both lighter and darker colors.  For a few of the dolls I glued on a bun or ponytail from embroidery floss, pipe cleaner or felt.

Painted Hair plus ponytail

Mrs. Claus with Felt Bun

With Mrs. Claus I started with all-white hair and added a few details with grey.  Her bun is made from narrow strips of white felt, braided then glued into place with hot glue.

The acrylic paint dries pretty quickly but you don’t want to mess it up, so while the hair is drying, I start working on the body.  Sometimes I paint  the whole peg and sometimes I paint the feet and sometimes I don’t paint it at all. Don’t glue the head on to the body until the clothing is completely done because it will be in the way and make it difficult to get the clothes on the body.

After the body paint is dry, take a pipe-cleaner and, with the peg aligned so the space is centered between the legs in front, wrap the pipe-cleaner from the front, twist tightly in back and bring the two arms around to the front. I like the arms right up at the top of the cylindrical portion before it narrows to the neck. Use craft scissors (not your good fabric ones) to trim the ends to a good arm length, leaving enough extra to bend little hands. I use more than half a pipe-cleaner for one pair of doll arms.

If you aren’t paying attention, you might end up with the legs and body out of alignment.  Some of my little sweeties ended up that way, but I decided not to sweat it.

Ladybug

Felt is great for clothing because it doesn’t fray. But I also bought “fat quarters,” quarter yards of fabric sold for quilting and other projects, and used pinking shears to cut out circles for the skirts and triangles for headscarves and shawls.  A scrap of eyelet lace trim makes an apron.

Babushka with a pot

Babushka with basket

Using colored pipe-cleaners to match the felt tops made sleeves for my little cardigans and jackets.  The little dog walker has felt mittens and pipe-cleaner ear muffs (not to mention a pipe-cleaner dachshund).

Dog Walker

Miriam Elf

I also made little sleeves of felt or lace for some of them.  The sleeves were cones or tubes that I glued on individually after putting on the bodice.

Angel

Skier with mirror sunglasses

Pink & Green Girl with bird

Rosie the Riveter

For Rosie the Riveter, the sleeves had rolled cuffs and I pushed the tube sleeve back and glued it in place.

For skirts, trace a circle on your fabric using a lid of a Tupperware container or something similar.  You’ll have to experiment to learn what size circle for what length skirt.  Cut into the circle from the edge to the center and cut out a small inner circle for the waist.  A larger inside circle made for more gathers in the skirt.

If you know me, you know that I really don’t sew.  I grew up with my mom and two sisters all very talented in that department, and I never had the knack (nor patience) for sewing. But for this project I got out my little Ziploc bag sewing kit, threaded a needle and ran small stitches around the waist of each little skirt.  Lay the doll down on the skirt and tie the thread tightly around her waist. I dabbed some glue (sometimes hot glue, sometimes Ailene’s Tacky Glue) where the skirt overlapped in back.

The rest of the clothing was made from snipping, folding and gluing with hot glue. When working on collars and necklines I would try on the head to check scale and once the clothing was finished, I used hot glue to attached the head.

In one instance, the clothing was more minimal.

Mermaid

A little felt for the tail fins, a tiny scrap of fabric for the top and lots of sequins created a beautiful mermaid.

After making about 18 of these little ornament, I’m still enjoying it and coming up with more ideas.  Once I get stands, I’ll make some that can stand on their own.  It’s been a real pleasure thinking up the right doll for each person and crafting each one with that person in mind.

Box of Clothespin Doll Ornaments

Looking at this box of dolls I’m reminded of “It’s a Small World,” and as the song says, it’s a world of laughter, a world of tears.  I experienced both this Christmas.

Thank you for your visit. Wishing you all the very best for a happy, healthy New Year!

24 Comments

Filed under Crafts

Apartment Curb Appeal

WELCOME

We live in a small apartment complex with a carport at street level, a flight of cement steps up to a common patio area and the doors to four apartments.  Metal stairs leads to the second floor and four more apartments.

The cement patio, with adjacent gravel roof over the carport,  inexpensive screen doors, an emergency ladder by our door and a chain link fence around the perimeter, is not the most welcoming space.

In the years we’ve lived here, neighbors have done what they could with plants in containers to soften the starkness.  I’m not much of a gardener and certainly a handful of pots on a paved courtyard don’t make much of a garden, but it does help to make the entry to our home more inviting and welcoming.

Lately I’ve become a little blind to the space that I walk through on the way to and my car, and it had gone from appealing to neglected.

Behind these pots, for example, was a mess of dried leaves, spiderwebs, cat hair and dead bugs.

Neglected Plants

The plants had seen better days.  Someone with more gardening skill (and patience) than I could probably have pruned the geranium and whipped it into shape.  I just see it, all leggy, and feel guilty.

There was a lovely collection of pots of dirt and one badly root-bound pot of spindly mint.

Pots of dirt

The larger boxes have bulbs in them and in the spring it is very pretty with daffodils blooming.  Now, not so much.  I’m still not sure what do do with them in the interim.

Then there was the dead rosemary plant.  I’d had two rosemary plants and the larger, healthier one had been mortally wounded when an upstairs neighbor dropped something over the railing as she was moving out.  It broke both the terracotta pot and the plant.  I gave it a dignified burial.

This one had gone from pathetic to pretty much a dried stick in a pot.

Dead Rosemary

Coming home from work and seeing that dried stick in a pot has been disheartening.

Finally – our door mat: the landlord layered a new one on top of the old one, and the combination didn’t offer much of a welcome.  Now both of them were worn out and ugly. It was time for me to give my garden some attention.

Not so Welcome Mat

A trip to the garden section of a hardware store got me started with a selection of succulents that were on sale.  From what I’ve read about succulents, they are a little more tolerant of some neglect.  I moved all the pots, swept the whole area and got to work potting succulents.

Hello, Aloe

Pieces of abalone shell look nice in between the plants.

Succulents with abalone shell

I love going out the front door for a pinch of rosemary so picked up two healthy new rosemary plants.  I  expanded my options and got thyme and mint as well.

Healthy Rosemary

Rosemary and Abalone

I like how the variegated ivy looked so I put it in the pot with the thyme.

Thyme and Ivy

I found a pot on sale at OSH in a pretty shape and color for the mint. An anonymous neighbor contributed something that might be cilantro that the local kitty is very interested in.  Maybe it’s fresh catnip.  I picked up a lantern and candle at IKEA.

Blue Square Pot

A lavender plant also caught my eye.

Lavender

Over the course of several evenings after supper and some time on the weekend, it started to pull together.

Plant with driftwood and shells

A neighbor gave me some faux terracotta pots to use, I bought a few new ones and re-used ones I already had.  I put all the new plants into pots, and re-potted the healthier plants.

I was a bit more selective with the pieces of driftwood and abalone shells I’ve collected over the years.

Curvy Driftwood

I think the wood and shells make the patio surface look a little like a beach.

Wood & Shell

I love how the rosemary looks – so healthy!

Spider Plant

The rust on this stake is just the right color for this happy dachshund.

Dachshund

The finishing touch was at the top of the post: a new Welcome mat.

Angled Welcome

The view from the front door is so much better now.

Front Door View

More welcoming, don’t you think?

Kitty at the Door

A few days after pruning and re-potting, this plant has some tender new leaves.

New growth

I’m already thinking about getting a small table and chairs but I think I’ll wait until next spring.

Garden Gloves

Thank you for stopping by.

10 Comments

Filed under Life

Wrapped Leather and Bead Bracelet

Coral and Green Wrap Bracelets

Last summer I got on a bit of a bracelet binge.  I made wrapped ones with leather and bead-ball-chain.  I made some macrame ones. And I made a bunch of beaded braided ones.  I even made a bracelet keyring.

Bunch O' Bracelets

But then I sputtered out.  I’d planned to give bead bracelets as Christmas gifts but I ran out of beading energy.

Maybe summer and short-sleeves makes me want to craft and wear bracelets, because once again, I’m beading.

3 Bracelets

This time, I’m trying the Chan Luu style wrapped bracelet. I’ve been seeing variations of these bracelets all over with plenty of how-to videos and DIY blogs. I read and watched enough to feel like I could give it a try.  Now that I’ve made two, I’m no expert, by any means, but I feel like I might be able to walk you through making one with enough detail so you aren’t lost and not so much as to confuse the matter.

There are different ways to create the bracelet, including a double-needle method  that just looked too complicated to me. You can make a bracelet that wraps just once around your wrist or one that wraps multiple times.  I’m going to show you a bracelet that wraps twice but you can use the same technique to make a longer bracelet.

Coral Wrap Bracelet

Here is what you will need for one bracelet.

Wrapped Leather and Bead Bracelet

Supplies:

Supplies

5 feet of 1.5 MM leather cord (you can also use faux leather or cotton cord)

4 mm beads – I used 14 inches (I found them on strands and got enough to go around my wrist twice – this is a little tricky because it depends on the size and shape of the bead*, the size of your wrist and how many times you are going to wrap the bracelet)
Nymo bead thread – (I used size D) in a color that matches your leather cord
1 button
A flexible beading needle
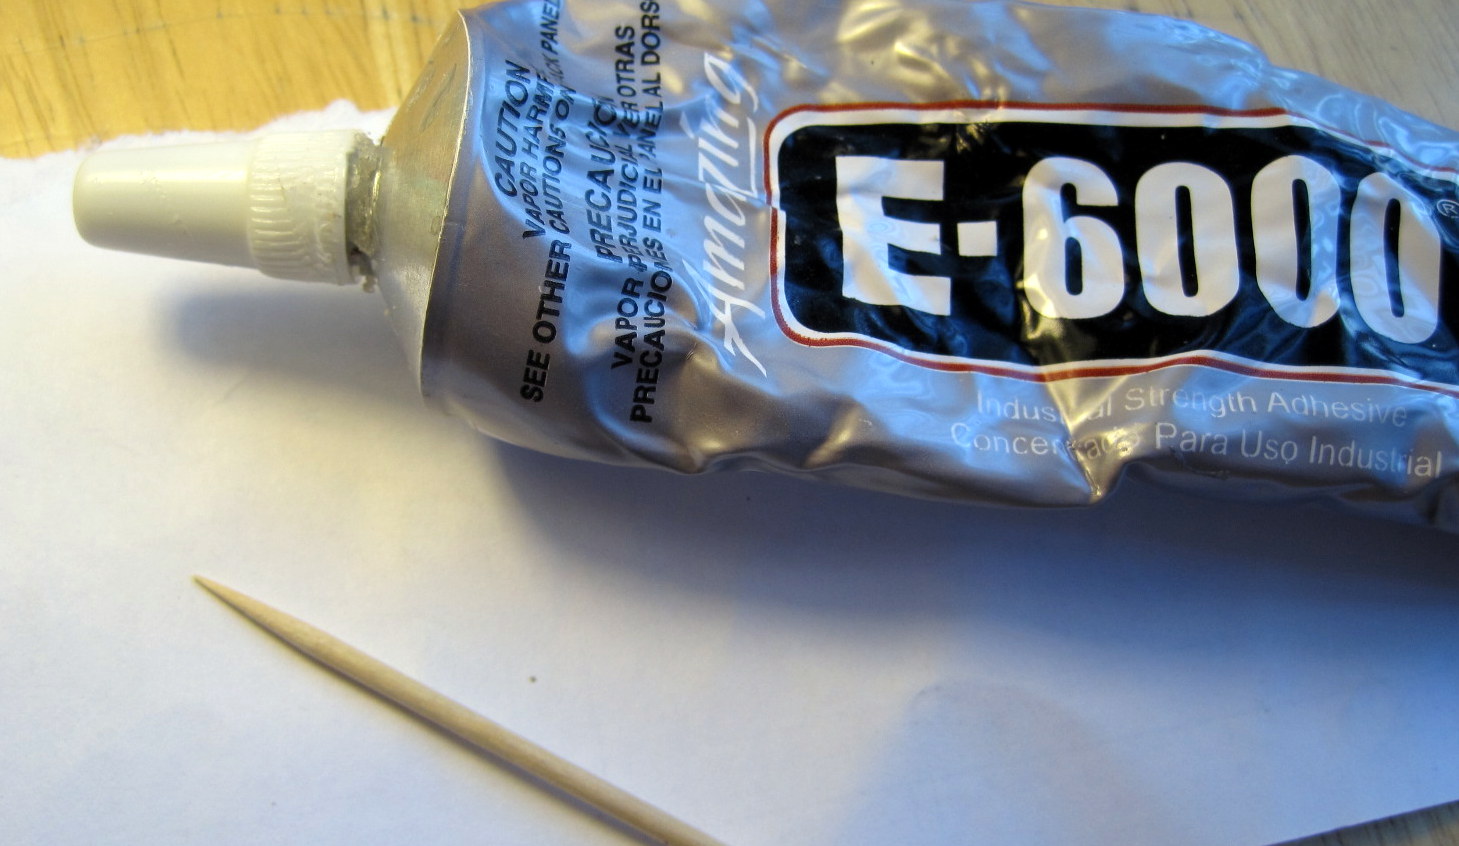
glue – I used E6000
scissors
tape (not shown)
Optional: two smaller beads for the start and end of the bracelet
Bead ShapeIf the beads you choose are round, it won’t make a difference, but if you buy a strand of oval beads, they would be strung the long way, or end-to-end.  In this project the beads get strung between the two leather cords side-to-side.  Allow a little extra for oval beads.
What You Need
Directions:
From what I can tell, the classic Chan Luu bracelet ends with a series of knots and loops in the leather to allow for some size variation. I prefer to start my bracelet with a single loop and knot.  If you want your bracelet to be more like a real Chan Luu bracelet, you will start with your button and end with the knots and loops.
This is the Chan Luu style (the part to the left of the button would be the beaded bracelet, so you’ll have to use your imagination:
Knots and loops
This is what I did:
Single Loop & Knot
Fold the length of leather cord in half and tie an overhand knot, leaving a loop just large enough for your button to go through.
Thread the beading needle with a length of Nymo, doubled with a knot at the end.  I make it about arms length and than double that.
Push the needle through the knot in the leather, than bring the thread down under the knot in the cord and tie another knot in the Nymo.
Nymo Knot
Don’t trim the end of the thread just yet.
Weave the Nymo in a figure-8 pattern a few times over and under the leather cord, keeping it snug up to the knot at the end of the cord.
Figure 8 on Cord
Over Under Over Under
String on your first bead.  If using the smaller beads for the start and the finish, now is the time to use one of those beads.
Tape the leather cord to the table to keep it in place while you work.
Do the same figure-8 pattern, only now the bead will be between the two leather cords.  The Nymo cord will go under on the right, through the bead in the center, over the leather on the left.
Little Bead
Now back under the leather on the left, through the bead in the center again and back over the leather on the right.
Now continue with the 4mm beads.
Diagram over under
Cut Away Bead Over Under
Each Bead Twice
Continue adding beads, keeping the thread snug and the beads aligned.
Once you have a few beads in place, you can go back up to where you knotted the thread and put a little dot of glue on it.  Let the glue dry and trim the ends.
Glue the knot
Eventually, your thread will get shorter and you will need to end it and start another.
Leave Enough Nymo
After completing a figure-8 pattern in a bead, tie a knot in the thread on the back of the leather cord.
Knotting off thread
Now push the needle back through that same bead and tie a second knot on the left side of the bead.
Run thread back through
Put a little glue on each of the knots and let them dry before trimming off the ends of the thread.
E-6000
Glue those knots
Thread your bead needle again with a length of doubled Nymo thread, and knot the end.
Go back to the previous bead, the one before the one with the knots you just tied.  Pull your thread through the thread that is on the back of the leather cord and knot it on that side, than go back through that same bead and knot it on the other side, again, making the knots in the thread on the back of your leather cord.
Put a tiny dab of glue on the knots and when the glue has dried, trim the end of the thread.
To start a new thread
Now put the threaded needle under the knot of the next bead, and continue with a new bead after that, once again using the figure-8 pattern over and under the leather cord, going through the bead each way.
Put needle under thread
I like to always start my pattern on the right side, so to get back to the right, I go back through that bead one extra time, continue the over/under pattern.
If bead hole allows
Now just continue adding beads until you reach the length you desire.
Little Baby Bowl of Beads
Long Strand
Check the length around your wrist, allowing for the button.
Finish with the last bead, using a smaller one if you choose.  Wrap your thread snugly a few times in a figure-8 around the leather cord.

Tie an overhand knot in the two pieces of cord together.

Knot at the End before the Button
Measure bracelt on wrist
Add your button. (If you started with a button, this is where you would leave a space of cord sufficient for the button to fit through and tie another knot and even a second space and third knot if you want).
For this bracelet, I used a button with a shank, so I could pull one piece of the leather through the shank.
For this button I didn’t need the beading thread, so I knotted it after the last figure-8’s and glued the knot, let it dry and trimmed the ends of the thread.
Leather through shank
You can use a button with two or four holes if you prefer and use the bead needle and Nymo thread to stitch the button onto the cord.
Knot the thread and, as before glue the knot, let dry, and trim thread ends.
Once you have attached your button, tie a second overhand knot.  Trim the ends.
Trim that knot
That is it!
Done!
Worn by itself it is simple and pretty.
One Bracelet
You can turn the button so it is more on top too.
Button on top
It also looks great layered with more bracelets.
Layered with silver band
I love how it looks with this gorgeous, old silver and turquoise bracelet that I got from my grandparents for my 18th birthday.
Turquoise
My dad’s dad made it and gave it to my dad’s mom, so it is not only a lovely piece, it has a history.  My dad was a rock-hound and amateur jeweler, like his dad.  I have crafting genes on both sides of my family!
The other wrap bracelet I made, of green glass beads, was made using a different type of beading cord that comes with a needle already attached.
Two coiled bracelets
I liked the idea of the green thread being a part of the design, but after struggling with that one and comparing the two finished bracelets, I prefer the look of the coral bracelet, where the thread matches the leather.  If you like the look of the colored thread, Nymo comes in different colors, though it is thinner than the green cord pictured here.
Needle Attached
One of the biggest challenges was the length of it.  I finally cut it shorter but than had to find another needle.  I’m not happy with how visible the knots are with this cord and it was much slower going because it got twisted and tangled easily.
I don’t recommend using this cord for this project.  Get Nymo!  It was so much easier to work with.  The right supplies really make a big difference.
Beautiful Bracelets
Thank you for the visit.

15 Comments

Filed under Crafts

More for Mom

Here are a few more ideas for Mother’s Day from past posts.

A beautiful, rose-covered Mother’s Day Hat Card.  The tutorial has lots of pictures, directions for making the swirled paper roses and a template for the hat card.

Mother's Day Hat Card

Last year, I made a Mother’s Day Butterfly Card: a bouquet of stamped and cut out flowers with a vellum butterfly embellishment.

Butterfly Card

A Glass Tile Pendant would make a pretty gift.  Consider a photo in place of decorative paper used in this project.

Glass Tile Pendant

Speaking of  a photo, these Glass Marble Magnets use just that – and what mom (or grandma) wouldn’t enjoy a set of magnets for the fridge with photos of her kids or grandkids?

Glass Marble Magnets

The classic Mother’s Day treat is breakfast in bed.  In bed or at the table, these Buttermilk Lace Pancakes are beautiful and delicious.

Lacy Pancake

If Mom wants to sleep in on her day, she should be allowed that luxury.  Serve her Baked Feta with Greens and Avocado Salad for lunch instead of breakfast.

Baked Feta and Avoado Salad

Thick, Chewy Granola Bars are easy to make and would be a nice make-ahead for either breakfast or a treat later in the day.  A flexible recipe means lots of yummy possibilities when making these oat bars, loaded with dried fruit and nuts.

Thick, Chewy Granola Bars

Thank you for stopping by.

4 Comments

Filed under Cooking, Crafts

Watercolor Heart Card for Mom

It’s May and Mother’s Day will be here before you know it – Sunday, May 12, to be specific.

Watercolor Heart Card

Here is a beautiful card you can make for mom, that looks harder than it really is.  I was inspired by this stunning card  at oh so very pretty, complete with intricate calligraphy, but knew my version would be a little simpler.

With the right tools and tips, you can make one too!  It isn’t just for Mother’s Day either –  I’ve already done a version of this card for a retirement and a birthday and I think it would be perfect for a wedding.

Paints and Crayons

Supplies:

Watercolor Paints or Watercolor Crayons like the awesome Neocolor II Water-soluble wax pastel by Caran d’Arche.  You can buy individual crayons at art supply stores.

Brushes

Watercolor Paper

White Ink Pen  – mine is the Uni-Ball White Gel Pen and the label says it is pigment ink

Colored Card Stock to complete the card

Scrap Paper for making a template

Scissors

Adhesive I like Tombow mono adhesive

Paper Trimmer (optional)

Heat Tool (optional) This makes drying time really short, but if you have more patience then me, you can still make this without a heat tool.

Directions:

Determine the size of your card.  I often use a half-sheet of 8.5 x 11 inch paper, scored and folded in half to make a 4.25 x 5.5 inch card.

I actually just started with my white watercolor paper and painted the heart then built a card using that.  But my card is not a standard size and I will need to make an envelope to match.  So it might be easier if you start with the card.

Determine the size of your watercolor paper piece for the card front.  If using a 4.25 x 5.5 inch card, a piece that is 3.5 x 4.5 will work well.

Cut a heart out of a piece of paper, creating a heart-shaped template for your card front.

Heart Templates

I recommend painting more than one heart on separate pieces of watercolor paper, because in addition to being fun and very satisfying to make, the results are lovely and work beautifully for other occasions.

If you DO make want to paint more than one heart, it’s really a good idea to make a new template for each one.  The edges of the template get wet and painty and it is very easy to smear the edge of a second heart since your template already has paint on it.  Take it from me.

Put a few dabs of the mono adhesive around the backside of your template – I put one at the v in the center and at the point of the heart at the bottom plus a few around the edges.

Center the template on your piece of white watercolor paper, tapping gently to adhere it but don’t press too hard because you want to pull it off when you’re done.

Now use your watercolor paint or watercolor crayons and fill the heart with color.  I love the rich pigment of the watercolor crayons – it isn’t really obvious until you add some water.

Crayoned Heart

You can scribble bands of different color than go back with a wet paintbrush and paint it over the crayon.

Painting Water on Color

I experimented with different brushes and color combinations.

Foam Brush Heart

Watercolor paints work very well too – I swirl water into one color until my brush is loaded then I paint overlapping bands of different colors.  I think it looks best using analogous colors so it doesn’t end up getting muddy.

I was having so much fun, I decided to try some small hearts.  I used a heart-shaped punch for the template.

Small hearts template

I painted a row of hearts and then cut the heavy paper into individual little cards.

Little Hearts

But I’ve gotten off track.  These next steps are very important: when you finish painting, carefully lift off the template. If the edge of the painted heart is a little uneven, you can use a small brush and a little paint to even things out.  On the other hand, I think the raw edge of paint adds to the finished project.

Heart no template

Now let the paint dry.  This is really important.  If you have a heat tool, you can use that to dry the paint.  If your watercolor paper is really wet, be cautious how you aim the heat tool so you don’t end up spraying paint around.  Just keep moving the heat tool around until the paint is dry.  I found the paper started to curl so after awhile I flipped it over and heated the back.

If you don’t have a heat tool, you will need to use your patience.  If you try and write with the white pen on the heart, and your watercolor is still a bit damp, you won’t end up with white ink.  So be sure the paint is dry.

Now is a good time to rub off any bits of adhesive that were left behind from the template.  I have a little rubber square for this purpose, but a clean fingertip will do the job too.

Use the white pen to write a sentiment on the heart.  Go slow and easy.

Grateful

I found that even when the paint is dry, the pen tip scratches into the watercolor and needs to be wiped off.  Having a paper towel handy made it easy to wipe the tip of the pen.  Other times I scribbled onto scratch paper which helped to keep the white ink flowing. With most of the blue paints I was happier when I wrote over the letters a second time so they looked white and not light blue.

My hand-writing isn’t the best so I referred to a sheet I printed showing a font and used that as a guide.  This is called the Vimala Alphabet and I found it in the quirky yet fascinating book Your Handwriting Can Change Your Life  by Vimala Rodgers.  That is another project that so far hasn’t really gotten off the ground for me.  If nothing else, it is an interesting font.

Let the white ink dry then trim the piece of watercolor paper to the size you want.  If desired, you can paint on “Dianne Dots” a little row of three dots.  For this I made a template using a small hole punch and painted the dots to the right of the heart.  Again, lift off the template and let the paint dry (or help it along with the heat tool) before proceeding..

Painted Dianne Dots

Cut card stock for the card and another color for a layer and adhere the watercolor to the layer and adhere that layer to the front of the card.  Keep the watercolor theme going, and take a small brush and use paint to paint a message on the inside of the card.  I pasted a piece of white watercolor paper inside for this purpose.

Painted greeting

Scribble with the watercolor crayons onto scratch paper to make a little palette. Swirl a wet brush through it and pick up the pigment to paint the greeting on the inside of the card.

Here is another card I made using the same technique.

Memories & Dreams

I think the sentiment written in white ink looks as if the white paper is showing through the painted heart.

Even without any text, the watercolor heart is beautiful.

Painted Heart with Template

I don’t even know how old I was when I first put brush to paint, but my mom was almost certainly the one who washed my blue and purple fingers when I was finished.  Happy Mother’s Day, Mom, with lots of love.

Thanks for the visit.

9 Comments

Filed under Crafts

13 Valentine Craft Ideas

LoVe Stamps

For 2013, here are 13 valentine card and craft ideas from past posts. I also have new projects in the works, so stay tuned.

Fluttering Hearts Valentine Card. Double layered hearts adds dimension to this valentine.

Fluttering Hearts

Heart Strings. I love how these move in the slightest breeze. I used vintage sheet music to make them.

Heart Strings

Crayon Hearts  – chunky and colorful, these hearts are a great way to use up old, broken crayons.

Crayon Hearts

Alphabet Valentine

I Heart U

Decoupage Map Heart in Art From The Heart II post.

You Mean the World to Me

Punched Heart Garland with Vintage Paper. One of my first Pinterest-inspired projects.

Punched Heart Garland

Doodle Heart Background – add a poem or quote of your choice, a sentimental message or simply “Be Mine”.  This is an easy project.

Doodle Heart Background

My very first valentine post, this Paper Strip Heart Valentine is still a favorite.

Paper Strip Heart Valentine

Itty Bitty Banners – these are a great embellishment for a card and would be adorable as a little pennant for a cupcake.

LIttle Banners

Warm, fuzzy Felted Heart Garland.

Felted Heart Garland

Masterboard Valentine’s Tags – this is a method for making multiple tags (or card fronts) in a short time.

Masterboard Valentine Tags

Itty Bitty Valentine’s – little cards with the same double-heart design as the Fluttering Hearts Valentine’s.

Itty Bitty Valentine's

Crayon Wax Paper Hearts – just like you made when you were a kid.  If you haven’t made these before, you should give them a try now.

Crayon Wax Paper Hearts

Happy Crafting!  Thanks for stopping by.

7 Comments

Filed under Crafts