Tag Archives: watercolor

Hearts in a Tree

20160214_072056

I made these hearts for Valentine’s Day and hung them up in the tree in front our apartment to surprise Rem.

20160214_073950

The tree already looked pretty even before I added the hearts, covered in blossoms. It snows down white petals if you give a branch a little shake.

20160214_074016

People driving by smiled and some waved or gave me a thumbs-up.

20160214_082305

20160214_082428

Rem thought I was out taking a walk in the neighborhood.

He was amazed when he saw all the hearts.

20160214_081902

Here’s some of my favorite hearts:

20160211_123106

20160211_123019

20160211_124215

20160211_122948

Next January I’ll put up a post on how to make these hearts.

Thanks for stopping by.

20160214_082355


Leave a comment

Filed under Crafts

Day 28: 30 Day Journal

IMG_0307

“We are all thinking, willing, knowing, conscious centers of Life.

We are surrounded by, immersed in, and there is flowing through us a creative something… call it what you will.” ~ Ernest Holmes

It was a hot day yesterday and our apartment was pretty warm when I started to work on this. I often manage to start journaling or maybe pick out some images before work and spend some time on the project during my lunch break. I had some images but lunch came and went and nothing went in the journal.

IMG_0296

After dinner, I sat down at my desk. With a fan wafting a faint breeze I reviewed the magazine pages I’d pulled out in the morning and reached instead for watercolor paint and Neocolor watercolor crayons and went at it.

IMG_0297

Section by section I created a vibrant heart with drips and splatters of paint spreading outwards from it. Some drips start at the edge of the page and move inward to the heart.

IMG_0298

Around 9:00 I had made good progress. Rem and I left for a drive, wanting to get out of the stuffy apartment.

IMG_0295

An hour, one ice cream cone (each) and 6 degrees cooler later, we returned and I sat down to finish my page.

IMG_0303

I added the lyrics from a song by Tina Greene, from the Threshold Choir repertoire:

In this moment, I open my heart. In this moment, I open my heart.

And receive all the love, that’s always surrounding me.

In this moment, I open my heart.

IMG_0302

For Day 28 of this #30DayJournal project, this was my journaling, this was my page.

IMG_0305

Thank you for your visit.

2 Comments

Filed under 30DayJournal, Art Journal Pages, Crafts

Day 20: 30 Day Journal Project

IMG_0184-001

Nothing is original.

Steal from anywhere that resonates with inspiration or fuels your imagination.

Devour old films, new films, music, books, paintings, photographs, poems, dreams, random conversations, architecture, bridges, street signs, trees, clouds, bodies of water, light and shadows.

Select only things to steal from that speak directly to your soul.

If you do this, your work (and theft) will be authentic.

Authenticity is invaluable; originality is non-existent.

And don’t bother concealing your thievery – celebrate it if you feel like it. In any case, always remember what Jean-Luc Godard said:

“It’s not where you take things from – it’s where you take them to.” Jim Jarmusch

I had a little problem with the quote for this page, and what seems like encouraging the reader to steal from other sources, but I decided it was more a matter of semantics, because I certainly look at other art, layouts and photos in magazines, Pinterest and the sites that I find linked to pictures I like, and copy (imitate, use, adapt) all the time.

IMG_0185-001

Although it wasn’t feasible to take any photos the day I did this page, I found some photos I’d taken previously to use and then borrowed the image in the sunset photo.

IMG_0188-001

I also copied the border that I’ve been admiring on artist Deb Weiers pages for this project.

IMG_0196-001

I think I learn to expand my own style and techniques when I try another persons work. I may not do it with the same skill or medium, but maybe it will help me to grown and learn and also to put my own spin on it.

IMG_0197

I can’t recall looking at nature as an inspiration for specific pieces of creative work, although I love being outdoors and love all the different things I see. From a wide open vista of sky and ocean, to an up close view of textured rock or driftwood in sand on a beach, or the peeling bark of a tree.

IMG_0189

I may come back to this idea and try my hand at actually copying some of these close-up images and using them in my art.

IMG_0201-001

Thanks for stopping by. Thank you also for your patience as I catch up on these posts for #30DayJournal – I’ve caught up on the artwork, and now just need to get them online! Check back again soon.

Leave a comment

Filed under 30DayJournal, Art Journal Pages

Day 16: 30 Day Journal Project

IMG_0124

“Where are your combing seas, your blue water, your rollers, your breakers, your whales, or your waterspouts, and your endless motion, in this bit of a forest, child?”  ~ Walt Whitman

What replenishes your creative well? What inspires you?  I’d love to hear in the comments section.

Day 16 of my #30DayJournal was a great page to work on. I am inspired by things around me, by the work of other artists, by the juxtaposition of colors that I might see in nature or on a building or a sign.

IMG_0121

I’ve been very spontaneous with this project and love how this page evolved. My last name means peacock and I’m a fan of peacocks, as you can see from a Halloween costume a few years ago. Their feathers are so rich and beautiful. I decided to use a feather design for my page today.

IMG_0116

In the morning, I drew the feather on the right and saw how the barbs on the feather would work to contain the journaling, so added the feather on the left. Then I left for work. I did a little bit of the collage portion during my lunch break but as usual, most of it was done after dinner and late at night.

A beautiful mosaic is what I was picturing for the eye of the feather, so I used bits of paper in a collage.

IMG_0112

IMG_0122

Two colors of gold foil paper and two colors of glittery trim are incorporated into this part of the page.

Writing about what inspires and replenishes me creatively was easy – I did it first in pencil and went back with a black pen and then colored pens to embellish the letters.

IMG_0123IMG_0118

A few squares of paper on one corner help to anchor the design.

IMG_0128

I drew the quote for today in this corner as well, using a white pen and adding some color to the letter. Using a wash of watercolor over the white-ink quote inspired me to put a wash of color all around the feathers. The journaling portion has a lot of white and this watercolor added more color to the page.

IMG_0130

I appreciate your visit and invite you to come back to see what else I come up with for the rest of this 30 day project.

Leave a comment

Filed under 30DayJournal, Art Journal Pages, Crafts

Day 5: 30 Day Journal Project

IMG_0090-001

Be wild; that is how to clear the river. The river does not flow in polluted, we manage that. The river does not dry up, we block it. If we want to allow it its freedom, we have to allow our ideational lives to be let loose, to stream, letting anything come, initially censoring nothing.

That is creative life. It is made up of divine paradox. To create one must be willing to be stone stupid, to sit upon a throne on top of a jackass and spill rubies from one’s mouth. Then the river will flow, then we can stand in the stream of it raining down.” ―  Clarissa Pinkola Estés

I read this quote and the prompts for today and I was struggling with it.

In the morning I prepped a page. The paper in my journal isn’t very good, so I’m gluing two pages together and priming the paper with gesso. It was all dry and ready for my journaling.

I read the prompts again.

Today’s Journal Prompts:

  • If I invited my wildness out to play, she would take me…
  • If I were willing to be stone stupid, I would make…
  • If I weren’t afraid of being called stone stupid, I would…
  • I could stop censoring myself here:

Setting a timer for 5 minutes, I started writing on a piece of copy paper, without an idea of where it would go. I chose the first prompt and started writing. …and kept writing even after the timer went off. Inspired, I grabbed my open journal and bright yellow ink from a rainbow ink pad on my craft desk.

After swooping bright ink and splattering watercolor on the page…

IMG_0098

I realized I was way in the middle of the book not on the right page (which I’d prepped earlier)! That’s what happens when I invite my wildness out to play!

IMG_0091-001

IMG_0093-001

I left that page in the journal, turned back to the right place and did another page of swoops of colored ink and splatters of watercolor.

The envelope with the invitation to my wildness also has the journaling I wrote as part of this process.

After I put the envelope in the book, I realized I’d highlighted the wrong month!  I decided to leave it, even though it is really July, not June.

IMG_0094-001

Most of the things I create are fairly small in scale. This page made me think about larger, messier work that I can’t do easily at home at my craft desk.

Scratch paper that I used to cover supplies on my desk.

IMG_0095-001

Thank you for checking out my latest post!

#30DayProject

Leave a comment

Filed under 30DayJournal, Art Journal Pages

Art Journal: Backlog

IMG_0242-001

I’ve gotten behind on posting photos of Art Journal pages I’ve made.  I try to share them as I make them, but don’t always manage to do that. Let’s catch up, shall we?

Untitled, 8/11/13

This was inspired by a picture on Pinterest and when I followed the link, I found My Flower Journal, Tammy Northrup’s blog with beautiful splattered painting art.

IMG_0356-001

Tiny flowers are punched from textbook pages, painted different colors and glued onto a gesso and acrylic painted page. The meadow is made almost entirely from splattered paint dots.

IMG_0355-001

I used black and white pen to add details to the flower stems and leaves.

IMG_0357-001

Leap of Faith, Date Unknown (early 2014)

I don’t remember where I found this wonderful quote, but I love it!

IMG_0228-001

I’ve had this picture, torn out of magazine, for ages. It works well with the quote, don’t you think?

IMG_0229-001

A man in a flying machine along with some definitions torn from the dictionary and I had a page.

IMG_0230-001

IMG_0231-001

Bendy Bodies, Date Unknown (early 2014)

Mostly from Athleta ads torn from magazines.  I have a very inflexible body but I’m fascinated by the strength and flexibility shown in these pictures.

IMG_0233-001

Collaged Hills and Mountains, Date Unknown (early 2014)

I probably didn’t share this before because I’m a little ambivalent about it. This was the inspiration.  I don’t think mine was as effective.  White space at the top would probably have helped, and sharper images with greater contrast.

IMG_0239-001

Leaf Forms, August 4, 2014

Sometimes I look through my collection of ephemera (housed in a variety of plastic zippered sleeves, a tin box, a large basket and a shoebox) and find items that go together.  Maybe I’ve had one piece for a long time and I see something else and remember that first one and know they will work well together.  Other times I just start working on a page without really knowing where I’m headed.

The end result may be what I set out to create or something that I worked on layer by layer and bit by bit until it seems finished. For this page I wanted to use the large leaf skeleton on the right, so I looked for things that would go with it. But don’t ask about that #13, because I really don’t know how it ended up here, but it did, and I like it.

IMG_0242-001

IMG_0243-001

IMG_0244-001

IMG_0246-001

Our Lady of the Roses, October 10, 2014

IMG_0262-001

IMG_0263-001

I’ve had this picture of a stained statue for a long time.  When I embroidered a feather to use on a page the month before, I started looking for other images that would work with embroidered embellishment.  I needed to add a fold down flap to the page to have enough space to fit this in my journal.

The title has faux stitching made with dots of black ink joined by slightly curved lines made with a teal marker.

IMG_0261-001

I added a halo with embroidery floss.

IMG_0264-001

Dia di los Muertos, October  11, 2014

IMG_0266-001

I saw a project to do with kids using copied photos of their own faces (copy photos on copier, increase to approximately life-sized if photo is smaller), painted into a Dia di los Muertos mask.  I just pulled a picture from an ad in a magazine and created my own. I liked how the glamorous model became anonymous under the layer of paint.

IMG_0265-001

Sunday, October 12, 2014

At Sea Ranch I sit and watch the ocean and sky out the window.  This is an attempt to capture what I love to look at.

IMG_0268-001

IMG_0269-001

Blue Décollage, March 4, 2015

This page is from an exercise in The Collage Workbook, How to Get Started and Stay Inspired by Randel Plowman.

The exercise is to create a collage by layering pieces of paper on top of each other and the before the glue sets, tearing off the top layers to reveal what is underneath. As is typical, I reread the directions and examined the photos in the book more carefully after trying out the method.  I realized I started with too many small pieces, but it was an interesting process and I may try it again.

IMG_0184-001

IMG_0185-001

IMG_0186-001

Font, March 4, 2015

Another exercise from Mr. Plowman’s wonderful book on collage; he calls this one Typography and directs you to construct a collage using type from magazines or newspapers.

IMG_0187-001

IMG_0188-001

IMG_0189-001

Disconnected, March 8, 2015

Another page of typography.  In this one I tried to create new patterns and shapes from the pieces of letters I cut apart.

IMG_0190-001

IMG_0191-001

IMG_0192-001

IMG_0193-001

Thank you for visiting.

IMG_0245-001


4 Comments

Filed under Art Journal Pages, Crafts

Art Journal: Rarely Tidy

IMG_0227-001

Creative minds are rarely tidy.

No doubt there are plenty of creative people out there who are very tidy.  I’m not one of them.  When I saw this quote I knew I would use it someday in my art journal and over the weekend I finally did.

IMG_0173

I haven’t been crafting as much as I’d like.  I’ve been busier than usual at work recently and I’m trying to keep up with my daily fitness goals day (hello, Fitbit).  Crafting has been neglected.  As usual my craft desk has gotten piled up with supplies and tools because when I do have a few minutes to make a card or decorate an Easter egg, I always choose creativity over cleaning.

Did I ever share these?  I think I made them last year after Easter than put them away for this year. Sigh.

IMG_0051-002 IMG_0052-002

My friend Margaret and I got together to spend an afternoon playing with paper, glue and ink.  I didn’t have anything in mind so decided on making a few backgrounds.  With low mental energy I was looking forward to several long, luxurious hours crafting.  After a delicious lunch, we both spread out our supplies.  As usual I had brought more than I could possibly need or use, but I wanted to have plenty of options.

Do you do this?  You buy some interesting tool or supply but you aren’t sure how to use it so it just sits in the corner.  I felt I needed to pull out my small collection of stencils and start using them.  I watched a few crafting videos with tutorials on stencils  so I planned on doing some experimenting with some of the techniques I saw on YouTube.

I apologize for not getting more pictures of the process.  I used gesso to wash the page with a thin layer white so the type on the page still shows through in places.  Than I took two colors of pigment ink from a ColorBox rainbow stamp pad. Each separate color can be lifted out and used individually.

Taking out several shades of blue, I daubed the ink on the pages and used a wet brush to smear it around a bit, than dragged a plastic card (credit card size) through it.  You can see the results here, around the edges.  So far so good though if you are paying attention, you might note I didn’t even touch the stencils.  But I liked how it looked.  Yes, I used them later but not while I was creating this background.

IMG_0197-001

I went on to work on two more backgrounds.

IMG_0199-001

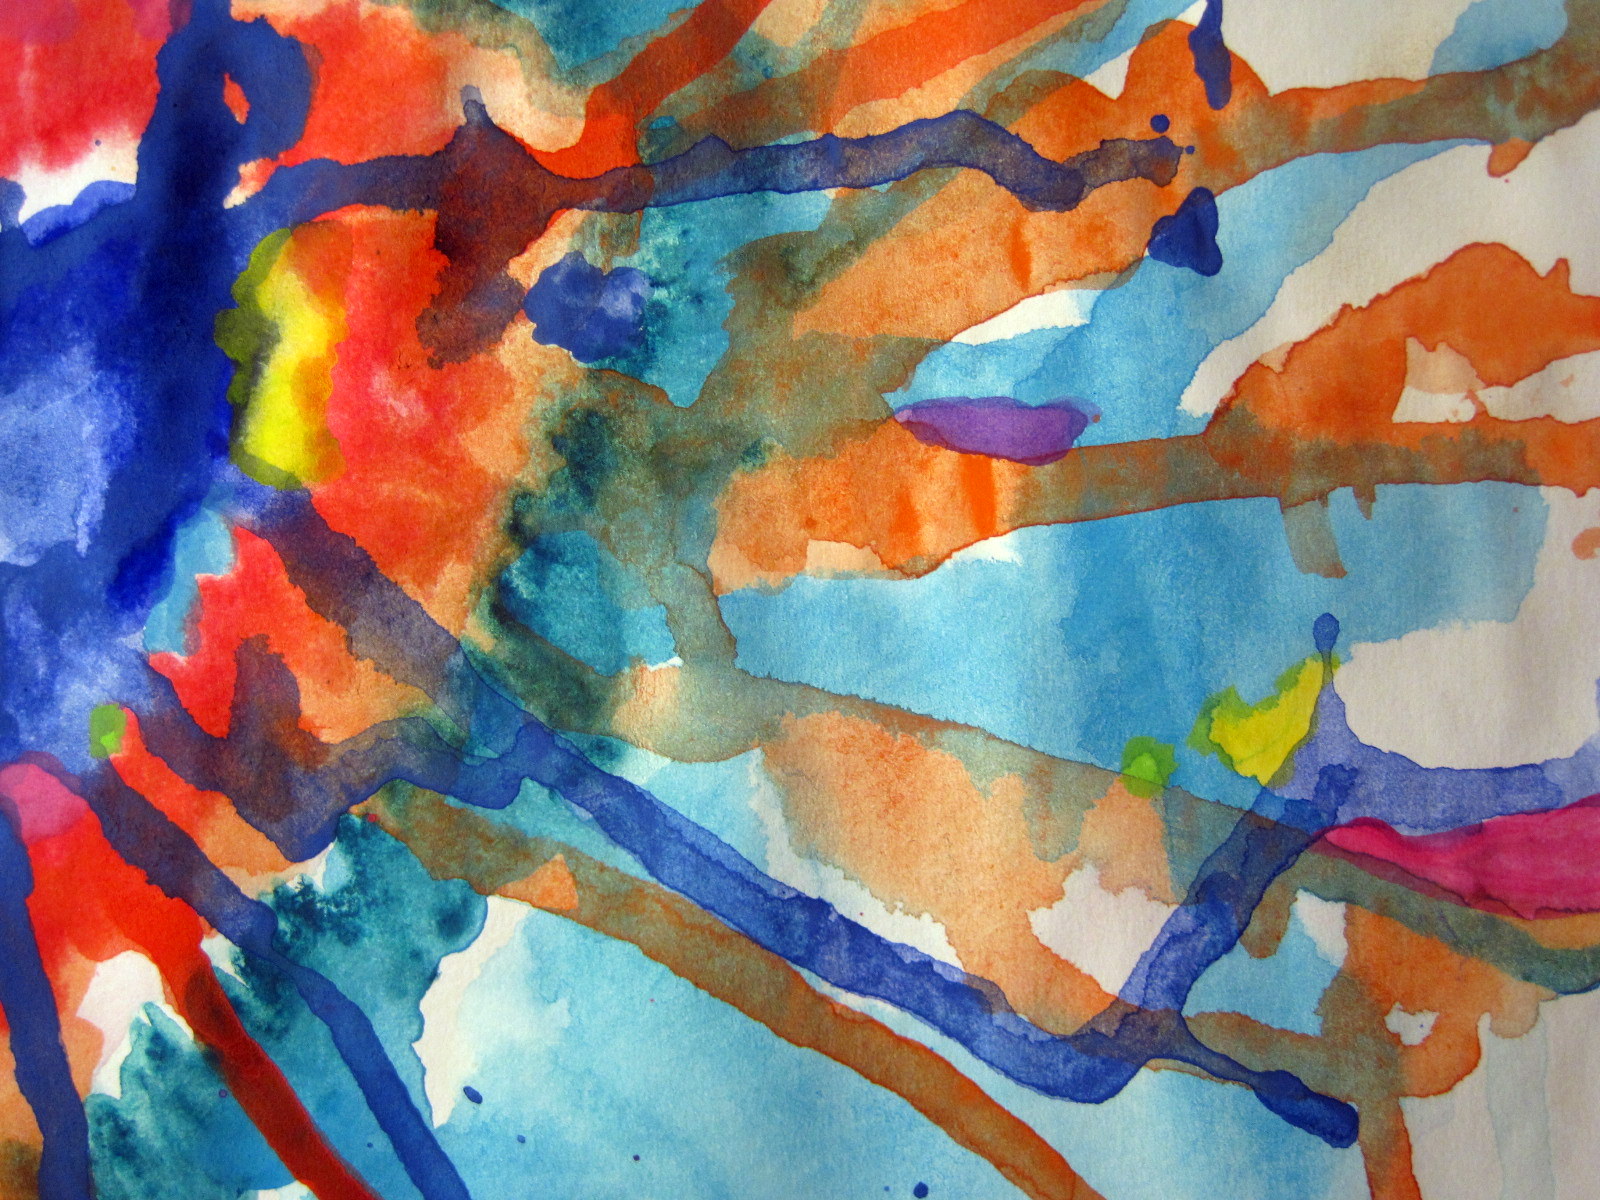
Again, I used gesso over the pages then on this one I painted on some watercolor and stamped on ink  in a rich magenta pink shade, than wet it and closed the book.  Pulling it open I got a kind of inkblot effect, which is now somewhat covered by the orange and white stenciling.  I’ll show you more of that one in a later post.

The last page I worked on that afternoon was made with strips torn from magazine pages.  The thin magazine pages are laid over a plastic stencil than gently sanded with a fine sanding block  (used sometimes for manicures).  This takes away some of the ink from the picture and allows the design of the stencil to come through.

IMG_0163-001

The stencil shows white where you sand the magazine page – I liked it with fairly dark photos or rich colors.

IMG_0164-001

I tore the sanded pages in strips and layered them into my journal.

IMG_0170-001

Again, I’ll write another post with more about that technique and page.  It looks great as is, kind of like a landscape with water and hills.  I started trying to make the quote work with this page but I realized it wanted something messier to go with it.  I think I still want to do more with this page but I’m not sure what.

That evening after dinner I pulled my journal out and opened it to the first background.  After playing with the stencils with the sanding block technique, I wanted to used them with paint, ink and sponges.  I started added some layers to the pages.

IMG_0158-001

I just started playing.  My favorite blues and purples came out as well as some bits of paper for layering onto the page. I put a stencil on the background I’d made earlier and sponged ink over it.  I then flipped the inky stencil over oto another place on the page and used a brayer to roll across it, transferring more ink.  This gave me two variations for each stencil: the negative and positive shapes.

For the word CREATIVE I had tried the sanding technique over some alphabet thickers (dimensional stickers usually made from chipboard or foam), but the resulting word was too soft and subtle.

IMG_0281-001

So I used another technique, using the thickers as masks and painting over them, drying the paint, than removing them. I saw it here at Pine & Plum, my friend Carson’s wonderful blog (yes, you should check it out!) Follow the link to where she has a guest post on another blog.  I also used it on another page here.  I picked up the letters at Dollar Tree.

Carson also inspired the bit of thread I twisted under the scrap of paper that has the rest of the quote.  I like how it adds a new element to the page.

IMG_0195-001

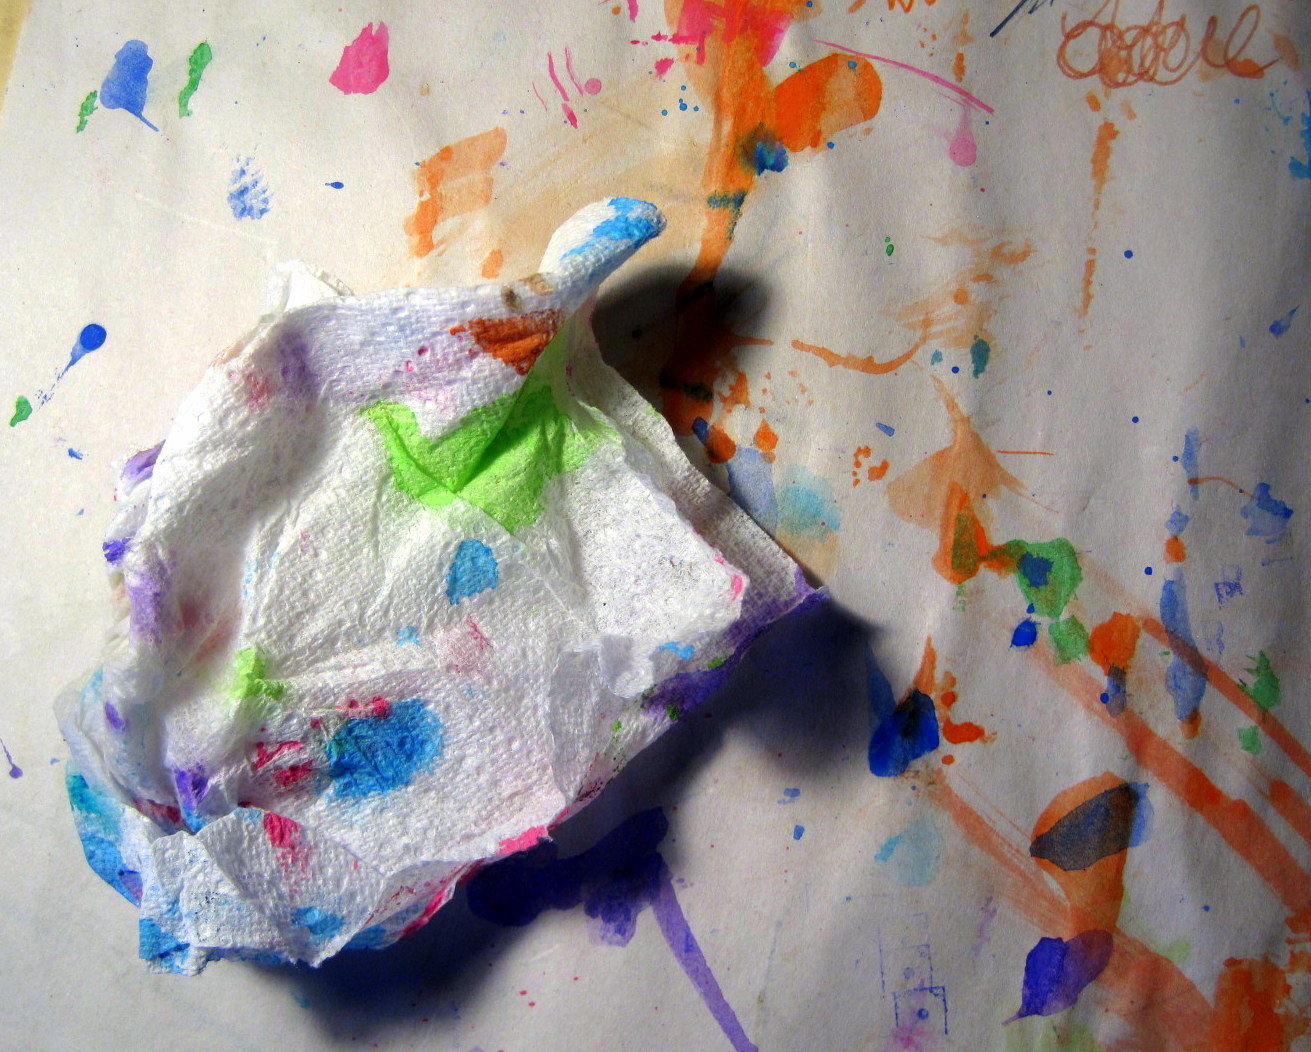
I added some splatters of ink and paint, loading up the watercolor brush and flicking it at my open journal. I was clever enough to remember to cover the area around the book with some paper towel first.

White pigment ink daubed rather messily through one of the stencils was my final detail on the page.  I took some photos and headed to bed.

The next morning when I opened the journal I was surprised to find the last ink I’d added to the page was still sticky! I don’t know if it was the gesso coating on the paper or what but even when I used the heat tool it didn’t dry.  I also decided both pieces with the quote on them were too neat and tidy looking

A piece of paper towel that I’d used to wipe painty brushes on had dried. I ripped pieces from that and covered some of the sticky white pigment ink. This added a new texture as well as a little deep orange which looked great with the blue.

IMG_0270-001

I added more pieces of the painty paper towel.

IMG_0275-001

IMG_0273-001

Rusty-orange watercolor paint got streaked and splattered on the page to go with the other orange.

Gold embossing powder covered more of the still-sticky white pigment ink.

IMG_0274-001

I’d already used a little washi tape, and added a few bits with orange patterns.

IMG_0276-001

Orange Dianne dots, gold embossing powder, and a sequin embellished the Creative title.

IMG_0277-001

Now I was really finished. It felt very satisfying to be creating in my art journal again.

IMG_0226-001

And, from the earlier pictures I took before, you can see how rare tidiness is in my creative world.

IMG_0172

Yes, it’s a mess. But at least it is my mess.

IMG_0171-001

Thanks for stopping by.  I really do appreciate every visit.

2 Comments

Filed under Art Journal Pages, Crafts

Latest Art Journal Pages

Sound Bite

I was so glad to have the day off today.  A tenacious summer cold has sapped my energy and I needed a down day.

After lunch I spent about 20 minutes cleaning off (most of) my craft desk so I could sit down with my Art Journal.  Actually, first I paged through a pile of magazines ripping out headlines and words in large fonts.  I tore and layered the bits of paper so that most of the words were unreadable.  I named this creation “Sound Bite”.

I don’t have a television and when I do occasionally spend some time watching TV, it feels kind of how this page looks.  I’m overwhelmed by all the words and noise and information that changes so rapidly.  The camera moves quickly and snippets of information flash by.

For the other pair of pages, I first painted a sheet of watercolor paper in big swaths of color, tipping the paper every which way to drip the paints through each other.  I also used watercolor crayons on the wet paper.

Dripped Paint

After the paint dried, I added some rubber-stamped patterns.

Paint + Stamping

Crackles

Next I cut this page into pieces.

Cut Up

Finally, I rearranged the pieces and glued them into my journal.

Patchwork

There’s something about this that makes me think of tornadoes and storm clouds, albeit more colorful than what you might see in nature.  I’m going to call this “Patchwork Color Storm.”

I hope your weekend was just what you needed.  Thanks for the visit.

5 Comments

Filed under Crafts

Easter 2012

Here are the blown eggs I decorated this year. This peacock egg is two-sided with a feather on the reverse. I did this egg with Sharpies, gold pen, watercolors and some adhesive jewels.

I actually made another peacock feather egg before this one.  A friend at work was celebrating her birthday and I did this egg for her.  It turned out so well that I decided to make a peacock egg for our family collection of Easter Eggs.  You can see a few more of those eggs here.

For this brown egg I used stickers from Starform; the same type of stickers that I used for vellum ornaments at Christmastime here.

Watercolor pens and adhesive jewels completed this design.

I also purchased a beautiful hand-painted goose egg (Kraslice) at the Farmer’s Market and a card with a photograph of more eggs done by the same artist, Lenka Glassner.

The sides have intricate details.  All the white is where she has etched through the paint to reveal the eggshell underneath.

For more gorgeous pictures of her eggs and information on the “traditional lace-like etching” techniques of the Moravian region of the Czech Republic, go here.

Our Easter table.

Wishing you a happy Easter.

Thanks for hopping by.

2 Comments

Filed under Crafts

Easter Egg Tree

I’ve been remiss in presenting any Easter craft projects.  I tried to make up for that with a last minute egg-decorating project but only managed to do all the things that you shouldn’t do.  Smudgy finger prints, gluey fingers with bits of paper stuck to them, etc.  So I will take some time to do it properly and save those helpful tips for next year.  For this Easter I present to you: photos from our family Easter Egg collection.

I don’t know when we started blowing eggs and decorating them – often with felt-tipped markers.  I know we used to have an egg I did for the bicentennial when I was 16 years old, so at least 35 years.  That egg has gone the way of others over the year – dropped  and broken or cracked beyond repair.

We used to find a good branch and put it into a flower pot to display them.   The blown eggs were carefully hung from the twigs of the branch which was fine until the pot tipped over and fragile eggs crashed to the table.  For quite a few years a branch was hung from the wrought iron chandelier.  The current method is a pair of ornament trees hung with eggs – one on the dining table and one on the piano.

Many different decorating techniques are represented: decoupage, mosaic, very shaky wax-resist Pysanky-style eggs, watercolor, pen and ink, and more.  We are lucky enough to have some eggs crafted by my Grandma Cooper (the pretty green with white flowers and white with blue flowers are hers). Other friends and family members have added to the collection, including some commercial eggs and I try and do a new one or two most years.

This is one of my 2011 eggs: blue and gold paper, gold ink, watercolor felt pen, adhesive gems, a button and a gold cord for hanging.  It is pictured in a birds nest I found years ago.

Below are the other eggs I finished this morning, packed and ready to go to my parents house.

Here are some sites I’ve visited with information about various egg decorating techniques.

Learn Pysanky

Wayne Schmidt’s Pysanky

Mosaic Easter Eggs (Save egg shells from peeled, dyed eggs for an egg-shell mosaic on a blown egg)

Paper-Napkin Decoupage Easter Eggs (Martha Stewart)

Thanks for stopping by and Happy Easter!

15 Comments

Filed under Crafts